
How to Choose the Right 3D Printing Technology for Your Project: FDM vs. MJF vs. SLA
- Jun 17, 2025
- 2 min read
Introduction
Choosing the right 3D printing technology ensures your part meets functional, aesthetic, and budgetary needs without unnecessary iterations. On the Gold Coast, Layered3D offers FDM, HP Multi Jet Fusion (MJF), and SLA. This guide briefly compares these methods to help clients decide quickly and confidently.
Technology Overview: FDM, MJF, SLA
FDM (Fused Deposition Modeling):
How it works: Melts and extrudes thermoplastic filament layer by layer.
Materials: PLA, PETG, ABS/ASA, TPU, engineering filaments (nylon, polycarbonate composites).
Strengths: Low cost; quick proof-of-concept; large build volumes; easy post-processing.
Limitations: Visible layer lines, anisotropic strength & moderate accuracy (±0.25 mm).
When to choose: Early-stage prototypes, jigs/fixtures, larger parts where fine finish isn’t critical

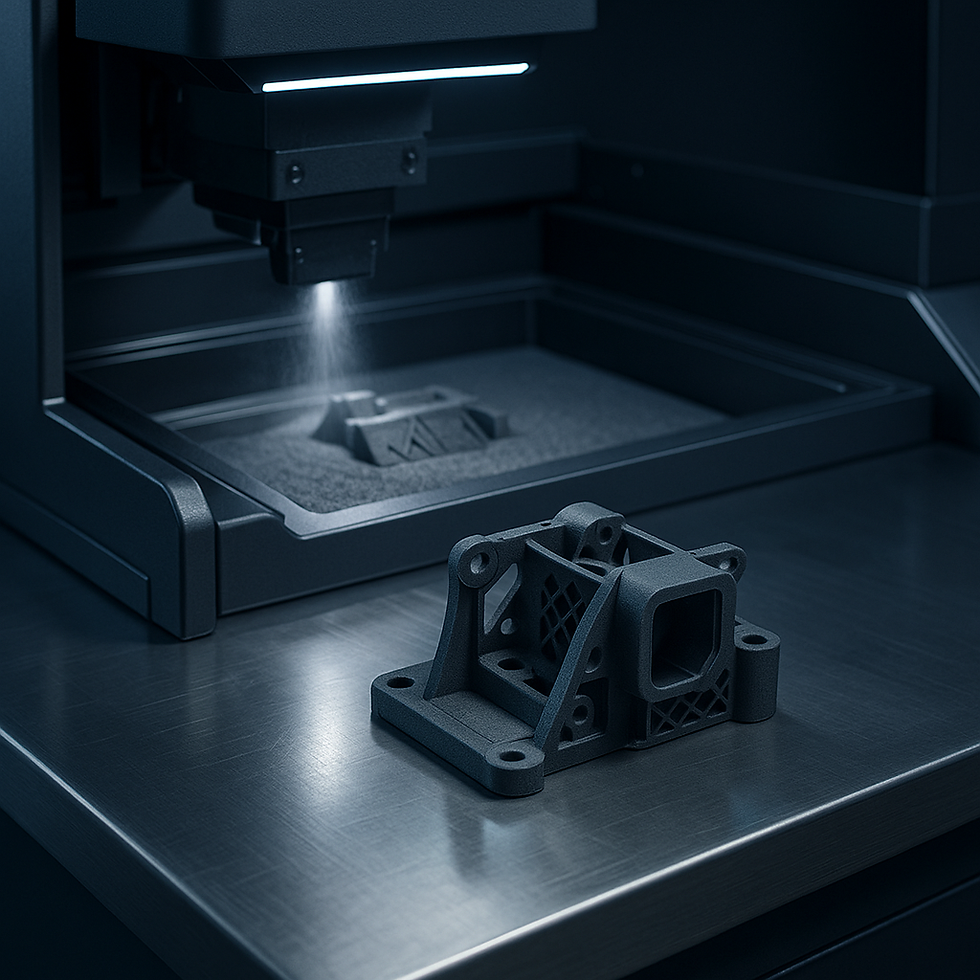
MJF (Multi Jet Fusion):
How it works: Jets fusing agents onto nylon powder, then fuses layers with heat.
Materials: Mainly PA12 (nylon) with uniform mechanical properties.
Strengths: Near-isotropic strength, good durability, finer detail and smoother finish than FDM and suitable for small series or functional end-use parts.
Limitations: Monochrome colour choice (Black or Grey), higher per-part cost and scheduling lead time of around 14 days from order.
When to choose: Durable functional parts, small-batch production, complex geometries (internal channels, lattices)
SLA (Stereolithography):
How it works: Cures photopolymer resin with UV light layer by layer.
Materials: Variety of resins (standard, tough, heat-resistant, flexible, biocompatible).
Strengths: Superior surface finish, high resolution, fine features, tight tolerances (~±0.1–0.2 mm).
Limitations: Brittle depending on resin, smaller build volumes, post-processing (washing, UV cure) adds time and resin handling safety considerations.
When to choose: High-detail visual prototypes, small intricate parts, precise fit/form checks

Key Decision Factors
Function & Mechanical Needs:
Load-bearing/end-use: MJF nylon or suitable SLA engineering resin.
Low-load prototypes: FDM often suffices.
Surface Finish & Detail:
Smooth, intricate: SLA.
Moderate finish acceptable: FDM or MJF (MJF smoother).
Accuracy & Tolerance:
Tight tolerances: SLA/MJF (~±0.1–0.2 mm).
Less-critical: FDM (~±0.25 mm+).
Part Size & Volume:
Large volumes: FDM is most flexible.
Small-to-medium: SLA for small parts; MJF for batches of durable parts.
Cost & Turnaround:
Quick proof: FDM low cost, fast.
Batch functional parts: MJF cost per piece decreases with nesting; faster than tooling.
High-detail visuals: SLA but account for post-processing time and cost.
Material & Environment:
Temperature, chemical exposure: select appropriate filament or resin; MJF nylon often robust.
Post-Processing:
FDM: support removal, light sanding, optional smoothing.
SLA: wash, UV cure, remove supports, possible sanding/painting.
MJF: powder removal, bead blasting, optional dye infiltration.
How Layered3D Helps
Consultation: Review CAD (STL/STEP) or sketches, clarify mechanical/environmental requirements, recommend optimal technology.
Design Guidance: Advise on wall thickness, orientation, supports to minimize iterations.
In-House Printing & QA: Industrial-grade FDM, professional SLA, and access to MJF. Dimensional checks and mechanical testing as needed.
Post-Processing & Finishing: Support removal, sanding, smoothing, dyeing or sealing for MJF parts.
Rapid Iteration: Fast feedback loop—print prototype, test fit/function, adjust design, reprint.
Local Advantage: Gold Coast-based workshop ensures quicker pick-up/drop-off or on-site discussions.
Ready to choose the right technology for your project? Contact Layered3D on the Gold Coast:
Share your CAD files or basic requirements, and we’ll recommend the optimal process, material, and lead time. Partner with us to minimize cost overruns and speed up your prototype or production parts.


Comments